外观
路由与菜单
路由介绍
路由是生成菜单关键,侧边栏和路由是绑定在一起的,配置对应的路由,侧边栏就能动态的生成。项目的路由分为两种:静态路由和动态路由。
- 目录:
src\router\
sh
|-- router
|   |-- index.ts # 项目路由实例,路由配置
|   `-- modules
| `-- remaining.ts # 静态路由- 文件:
src\router\index.ts- 创建了基于
history模式的 Vue Router 实例。 - 定义了一个可复用的 resetRouter 函数来清理动态添加的路由。
- 定义了 setupRouter 函数,方便在 Vue 应用中注册路由插件。
- 创建了基于
静态路由
静态路由介绍
静态路由,代表那些不需要动态判断权限的路由,如登录页、404、个人中心等通用页面。
- 文件:
src\router\modules\remaining.tsremainingRouter是一个定义好的路由表,它是一个数组,每个元素代表一个路由规则对象。
路由配置参数
路由配置参数
- 整个项目所有路由
name不能重复 - 所有的多级路由最终都会转成二级路由,所以不能内嵌子路由
- 除了 layout 对应的 path 前面需要加
/,其余子路由都不要以/开头
js
/**
 * redirect: noredirect        当设置 noredirect 的时候该路由在面包屑导航中不可被点击
 * name:'router-name'          设定路由的名字,一定要填写不然使用<keep-alive>时会出现各种问题
 * meta : {
 hidden: true              当设置 true 的时候该路由不会再侧边栏出现 如404,login等页面(默认 false)

 alwaysShow: true          当你一个路由下面的 children 声明的路由大于1个时,自动会变成嵌套的模式,
 只有一个时,会将那个子路由当做根路由显示在侧边栏,
 若你想不管路由下面的 children 声明的个数都显示你的根路由,
 你可以设置 alwaysShow: true,这样它就会忽略之前定义的规则,
 一直显示根路由(默认 false)

 title: 'title'            设置该路由在侧边栏和面包屑中展示的名字

 icon: 'svg-name'          设置该路由的图标

 noCache: true             如果设置为true,则不会被 <keep-alive> 缓存(默认 false)

 breadcrumb: false         如果设置为false,则不会在breadcrumb面包屑中显示(默认 true)

 affix: true               如果设置为true,则会一直固定在tag项中(默认 false)

 noTagsView: true          如果设置为true,则不会出现在tag中(默认 false)

 activeMenu: '/dashboard'  显示高亮的路由路径

 followAuth: '/dashboard'  跟随哪个路由进行权限过滤

 canTo: true               设置为true即使hidden为true,也依然可以进行路由跳转(默认 false)
 }
 **/
路由配置示例
静态路由配置示例:“个人中心”和“我的站内信”
js
 {
    path: '/user',
    component: Layout,
    name: 'UserInfo',
    meta: {
      hidden: true
    },
    children: [
      {
        path: 'profile',
        component: () => import('@/views/Profile/Index.vue'),
        name: 'Profile',
        meta: {
          canTo: true,
          hidden: true,
          noTagsView: false,
          icon: 'ep:user',
          title: t('common.profile')
        }
      },
      {
        path: 'notify-message',
        component: () => import('@/views/system/notify/my/index.vue'),
        name: 'MyNotifyMessage',
        meta: {
          canTo: true,
          hidden: true,
          noTagsView: false,
          icon: 'ep:message',
          title: '我的站内信'
        }
      }
    ]
  },
外链路由配置示例:只需要将 path 设置为需要跳转的HTTP 地址即可。
js
{
  path: '/external-link',
  component: Layout,
  meta: {
    name: 'ExternalLink'
  },
  children: [
    {
      path: 'https://github.com/kailong321200875/vue-element-plus-admin-doc',
      meta: { name: 'Link', title: '文档' }
    }
  ]
}
动态路由
实现原理
通过服务端返回的路由数据结构来动态生成路由表
- 实现原理: 是通过接口动态生成路由表,且遵循一定的数据结构返回。前端根据需要处理该数据为可识别的结构,再通过
router.addRoutes添加到路由实例,实现权限的动态生成。 - 优点: 所有的菜单控制都是通过服务端的接口返回,前端只负责渲染,后期维护成本降低
具体实现
实现步骤
- 在用户登录成功后,会自动触发前端,获取用户角色权限的菜单列表,并写入浏览器的
localStorage缓存
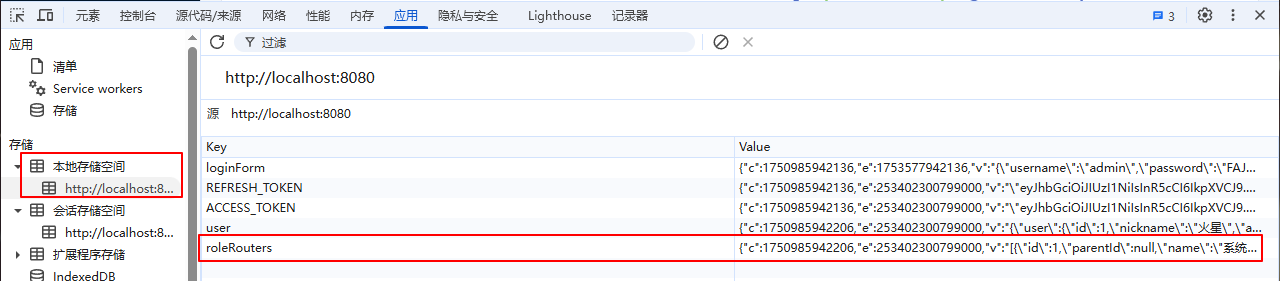
- 然后,调用文件:
src\store\modules\permission.ts的generateRoutes()方法,从缓存中生成可访问的动态路由,并添加 404 页面路由。
ts
    async generateRoutes(): Promise<unknown> {
      return new Promise<void>(async (resolve) => {
        // 获得菜单列表,它在登录的时候,setUserInfoAction 方法中已经进行获取
        let res: AppCustomRouteRecordRaw[] = []
        const roleRouters = wsCache.get(CACHE_KEY.ROLE_ROUTERS)
        if (roleRouters) {
          res = roleRouters as AppCustomRouteRecordRaw[]
        }
        const routerMap: AppRouteRecordRaw[] = generateRoute(res)
        // 动态路由,404一定要放到最后面
        // preschooler:vue-router@4以后已支持静态404路由,此处可不再追加
        this.addRouters = routerMap.concat([
          {
            path: '/:path(.*)*',
            // redirect: '/404',
            component: () => import('@/views/Error/404.vue'),
            name: '404Page',
            meta: {
              hidden: true,
              breadcrumb: false
            }
          }
        ])
        // 渲染菜单的所有路由
        this.routers = cloneDeep(remainingRouter).concat(routerMap)
        resolve()
      })
},- 上面方法,调用文件
src\utils\routerHelper.ts的generateRoute方法,实现具体的动态路由生成
ts
// 后端控制路由生成
export const generateRoute = (routes: AppCustomRouteRecordRaw[]): AppRouteRecordRaw[] => {
  const res: AppRouteRecordRaw[] = []
  const modulesRoutesKeys = Object.keys(modules)
  for (const route of routes) {
    // 1. 生成 meta 菜单元数据
    const meta = {
      title: route.name,
      icon: route.icon,
      hidden: !route.visible,
      noCache: !route.keepAlive,
      alwaysShow:
        route.children &&
        route.children.length > 0 &&
        (route.alwaysShow !== undefined ? route.alwaysShow : true)
    } as any
    // 特殊逻辑:如果后端配置的 MenuDO.component 包含 ?,则表示需要传递参数
    // 此时,我们需要解析参数,并且将参数放到 meta.query 中
    // 这样,后续在 Vue 文件中,可以通过 const { currentRoute } = useRouter() 中,通过 meta.query 获取到参数
    if (route.component && route.component.indexOf('?') > -1) {
      const query = route.component.split('?')[1]
      route.component = route.component.split('?')[0]
      meta.query = qs.parse(query)
    }
      // ...